
With my crochet squirrel pattern now in testing (it’s now released! Find the pattern here), I thought I would share a bit on how to crochet fur!
I wanted something adorably fluffy for my squirrel’s tail, just for a bit of contrast. Simply rubbing a brush against crochet until it frays is a common method for crochet fur, but I wanted something even fluffier than that – I wanted something that would have people wondering if it really is crochet.


In the end, I came up with two different ways on how to crochet fur. Both super duper simple, but each have their advantages and disadvantages.
Method 1 in my opinion works up faster, and it’s perfect for replacing single crochet stitches or creating your own pattern from scratch. It does, however, require learning a special stitch: the loop stitch. The grey squirrel tail on the right is an example of this crochet fur method; though I could have made it even more fluffy by cutting the loops and brushing it.
I despaired when I first attempted the loop stitch because it took me a few minutes for each stitch. Multiply that by 24 rows of squirrel tail and – well, you get the idea: torture. After a few loop stitches however, I had my few minutes reduced to a few seconds, and not much later, I had an adorable squirrel tail. In short: the loop stitch might be tricky at first, but you’ll catch on fast.
One important note: With this method, the fur will be facing ‘wrong side’ out due to the way the loop stitches are made. If you make a loop stitch every stitch, it won’t be noticeable.
Method 2 involves adding yarn strands afterward. You can also add it easily onto any project, even previously made creations! This is what makes it my favorite method. It takes longer and you’ll probably have a minor mess to clean afterward, but it’s easier to learn and definitely more secure if you choose to brush it out – more on that later. This method also allows you to pepper different colors throughout, which adds a cute contrast, as you can see in the bushy brown tail above.
Supplies Needed to Crochet Fur
YARN – you can use any size and in any type: I used 4g yarn, and the brand is likely ‘I Love This Yarn’ in the color Coffee and Linen, though I’m not 100% certain because I threw away the label (oops).
A CROCHET HOOK – size this according to the yarn: I’ve used F (3.75mm) and G (4.00 mm) for crocheting fur. I’ve used this inexpensive set for many years.
SHARP SCISSORS (optional for method 1, needed for method 2)
A BRUSH (optional) – a comb, slicker brush, or a cat brush would all work great
As you can see, the only things you really need are yarn and a crochet hook. If you’re reading this article, you likely already have all the supplies on hand already.
Abbreviations
I may use the following abbreviations in this tutorial…
St – stitch
Sc – single crochet (United States Terms)
Ch – chain
Rnd – rnd
YO – yarn over
Without further ado, let’s learn how to crochet fur!
How to Crochet Fur: Method 1
We’ll start with method one, which requires learning the loop stitch. I have a post in the works on how to make a loop stitch, but here’s a simple 4-step tutorial in the meantime, made into a magic circle. The same guidelines apply to a standard row.
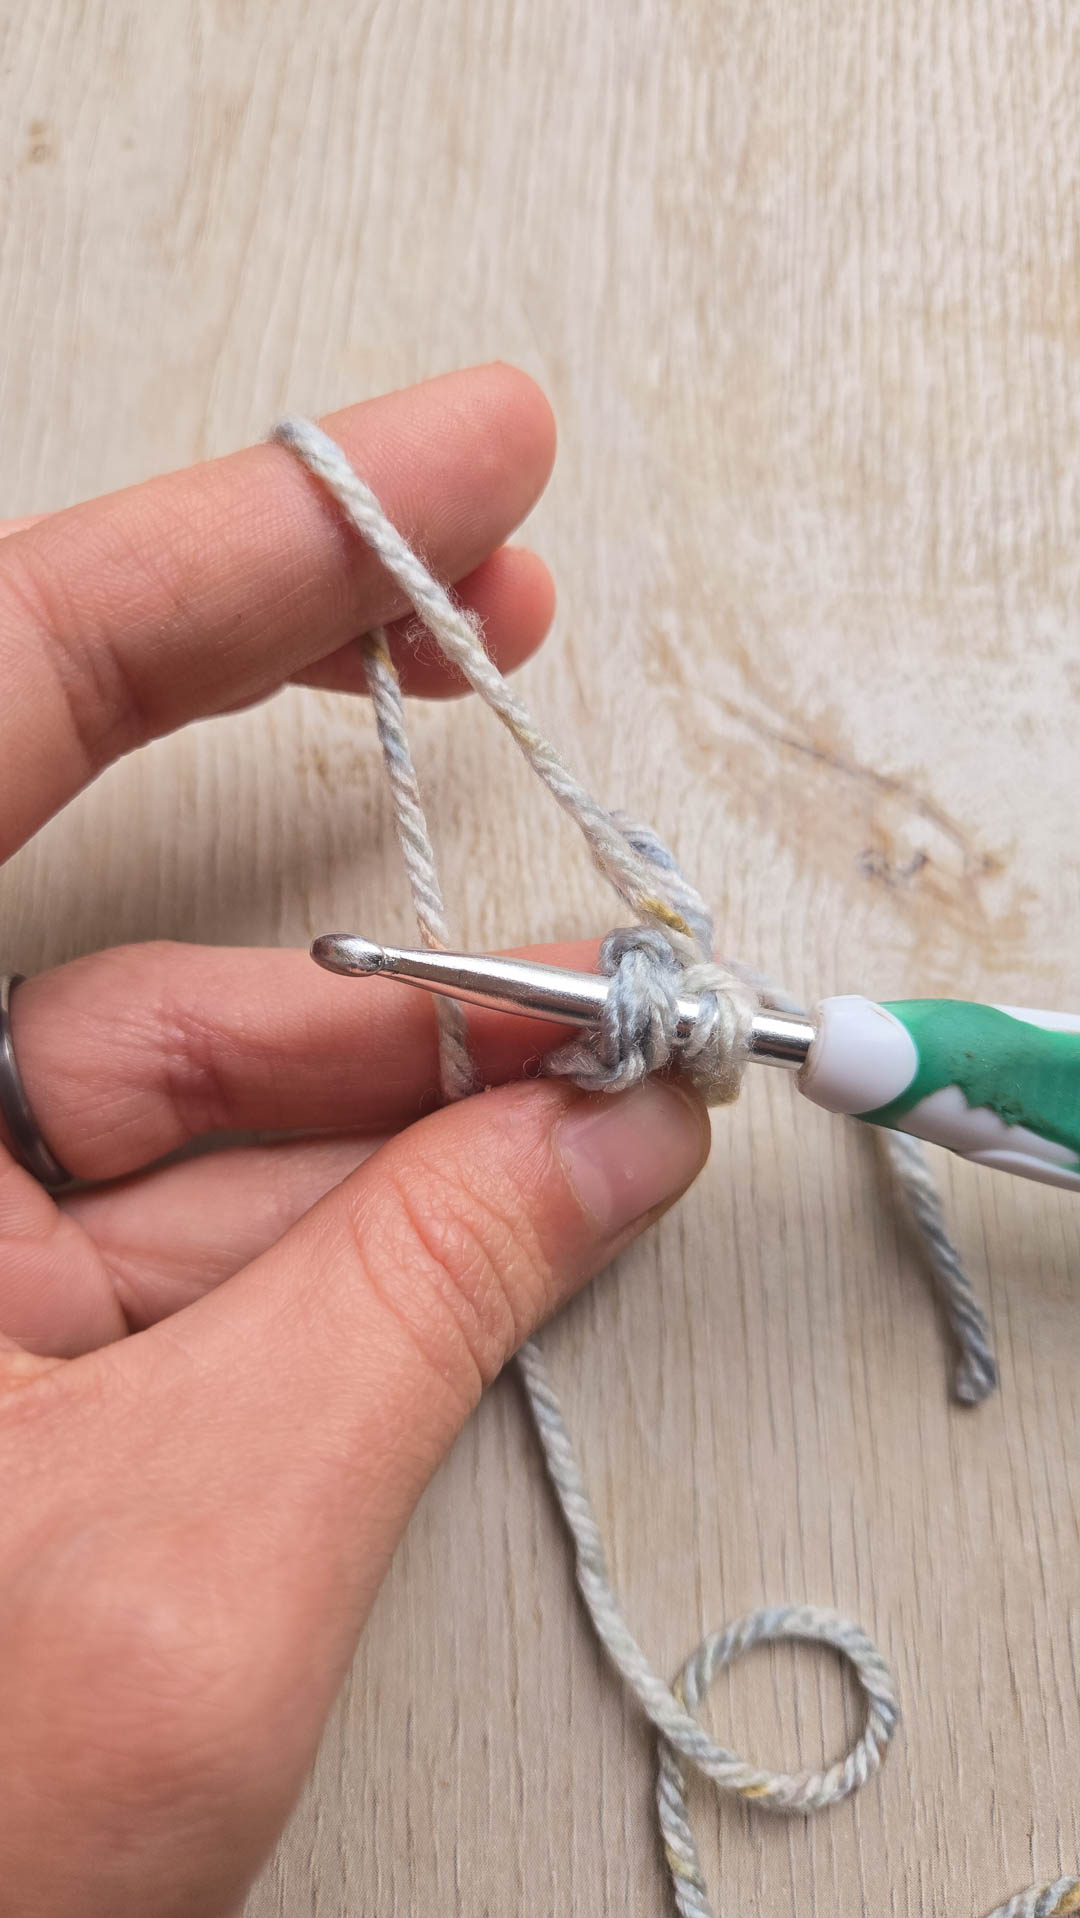
Step 1
Starting with a magic circle or row of any size, Insert hook into next st. Drape working yarn around pointer finger and hold it several inches away from the piece (I also find it helps to pin the working yarn between my other fingers several inches down).
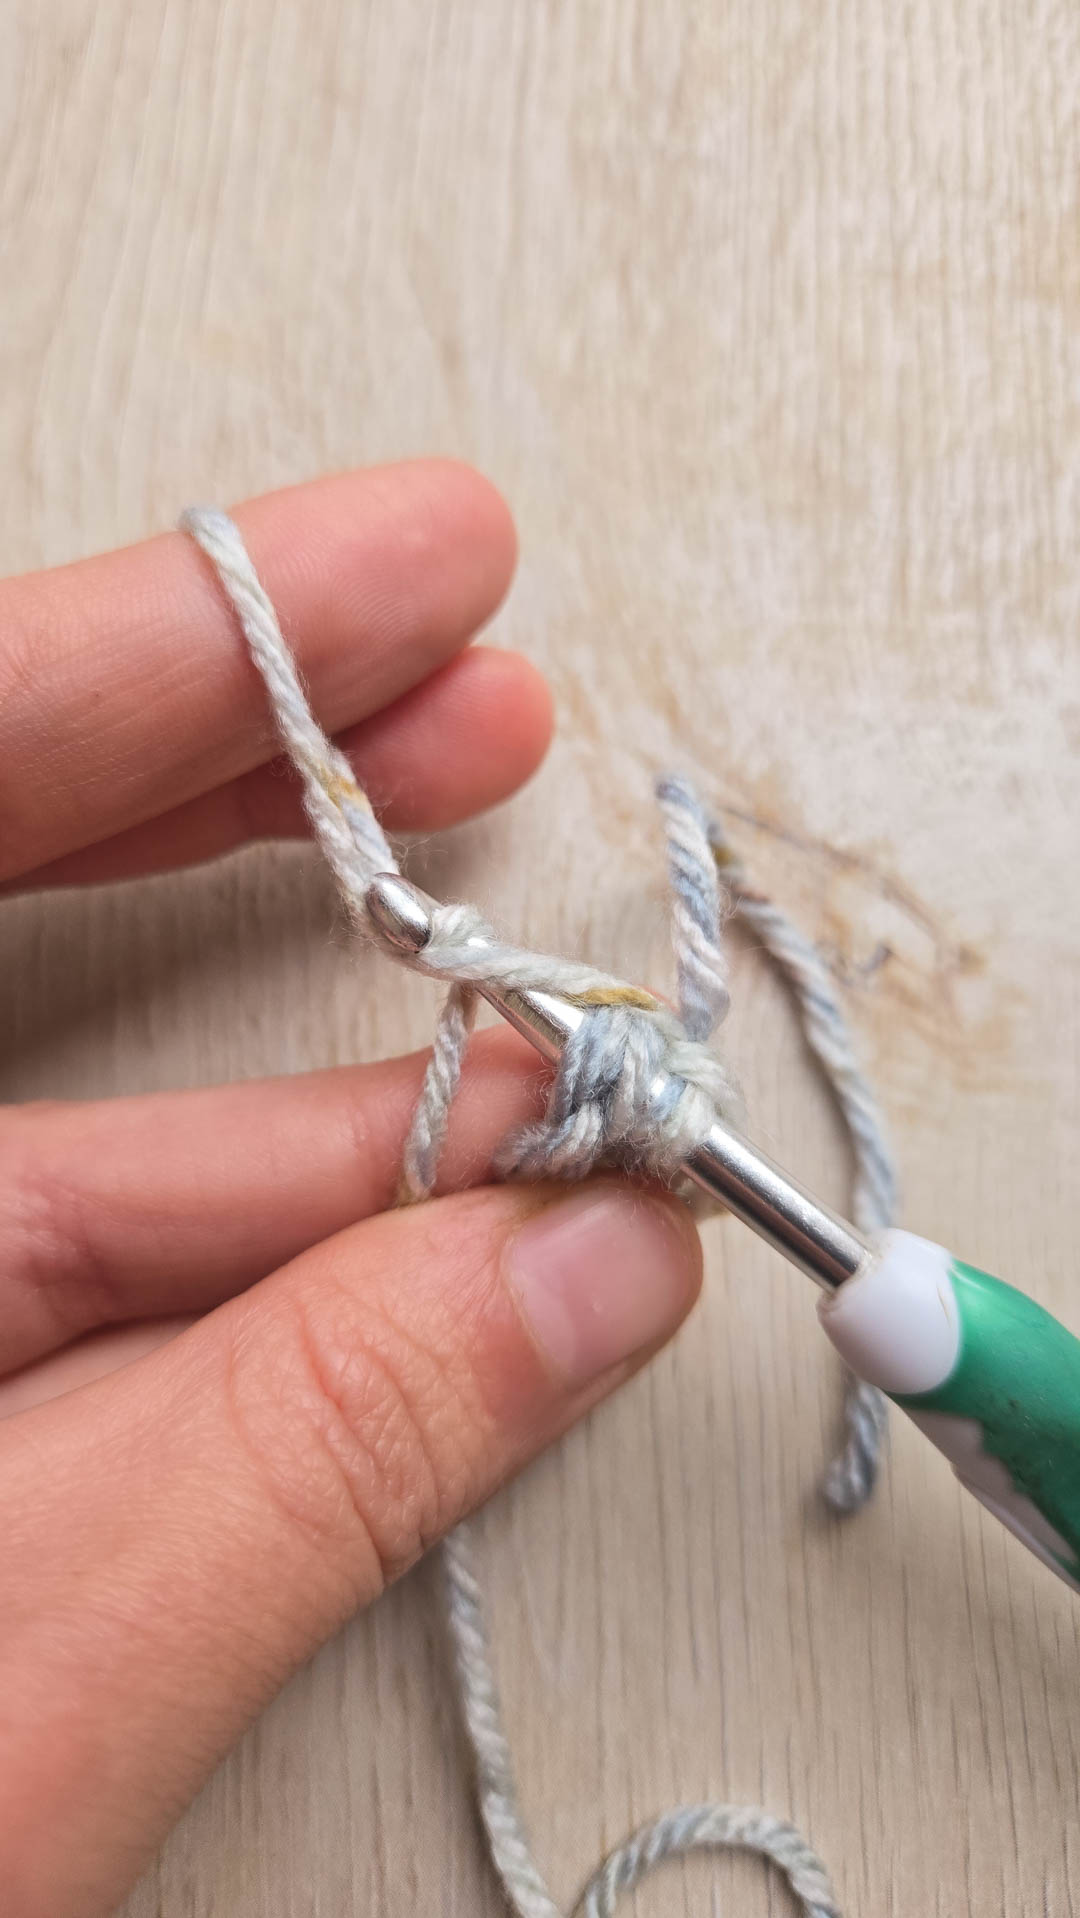
Step 2
With your hook, grab both sides of the yarn draping over your pointer finger.
Step 3
Draw both sides of the drape through the first st, forming a large loop.
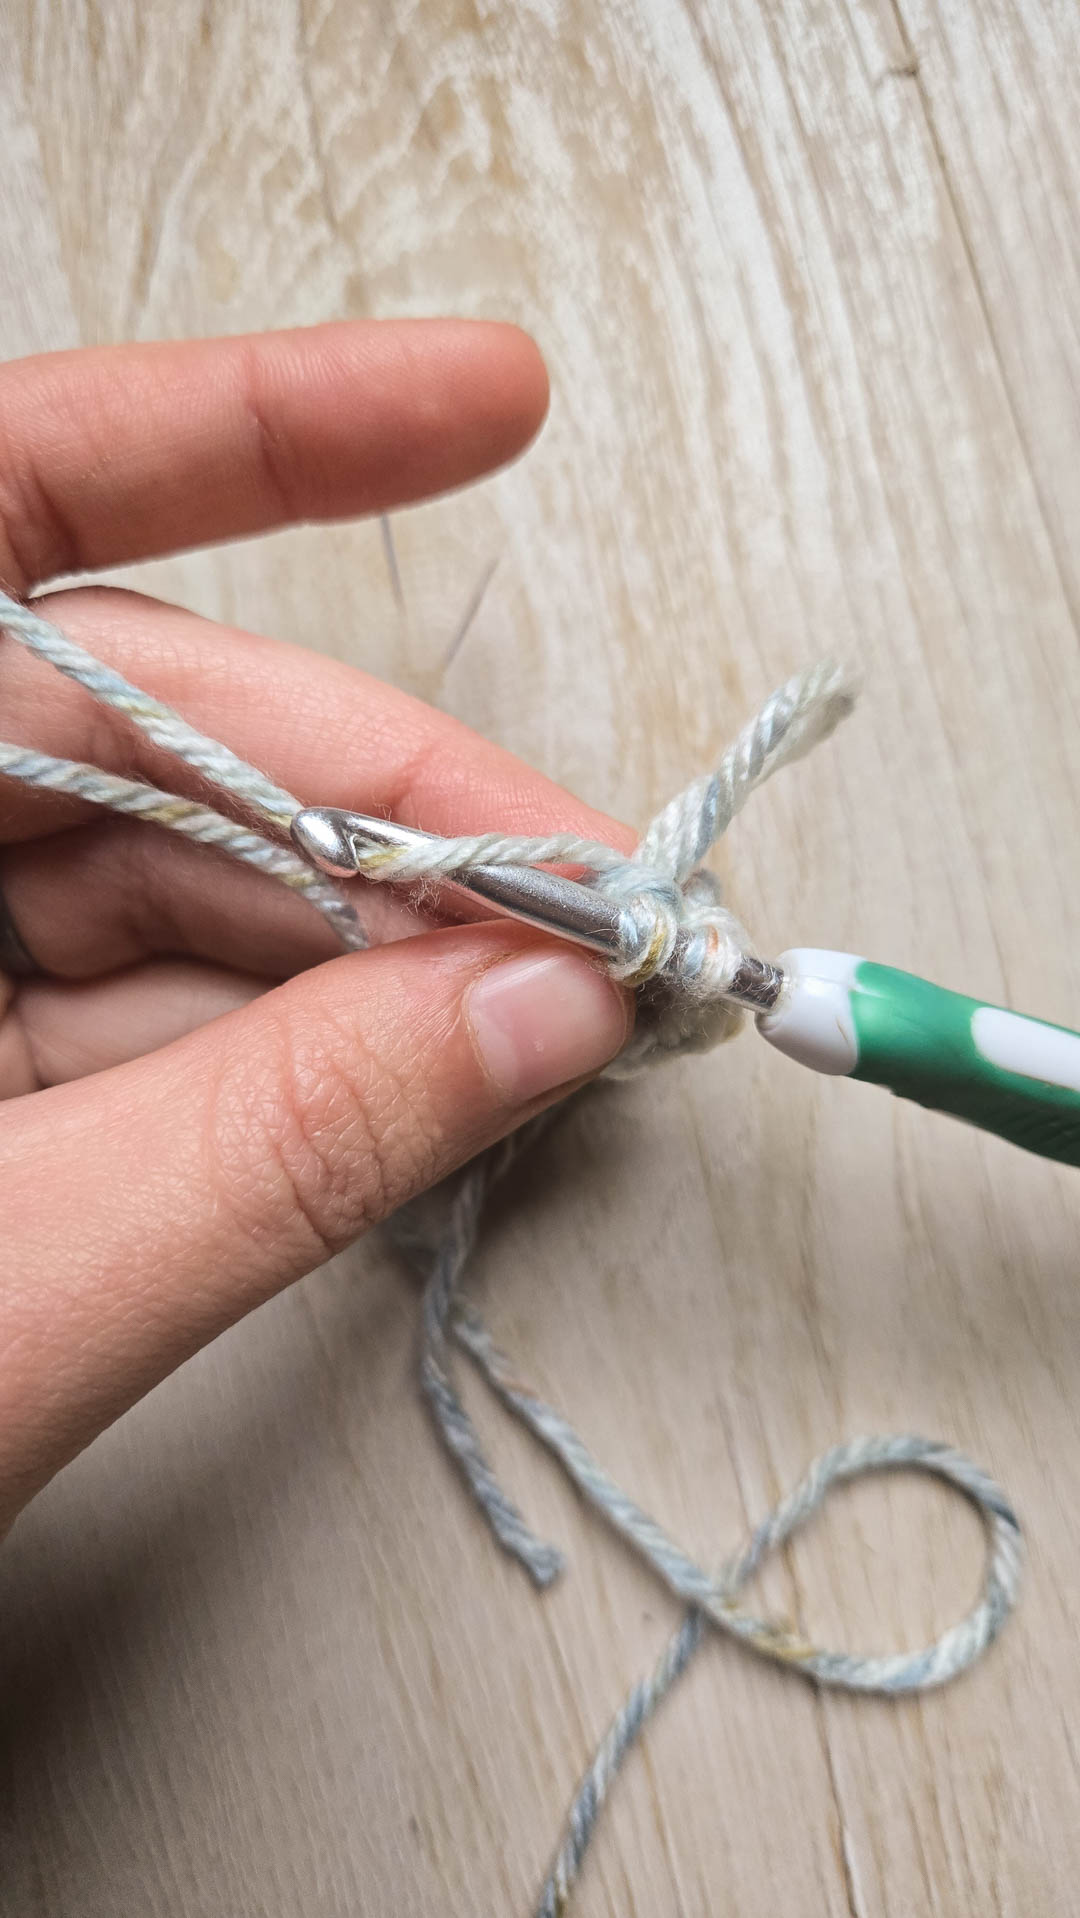
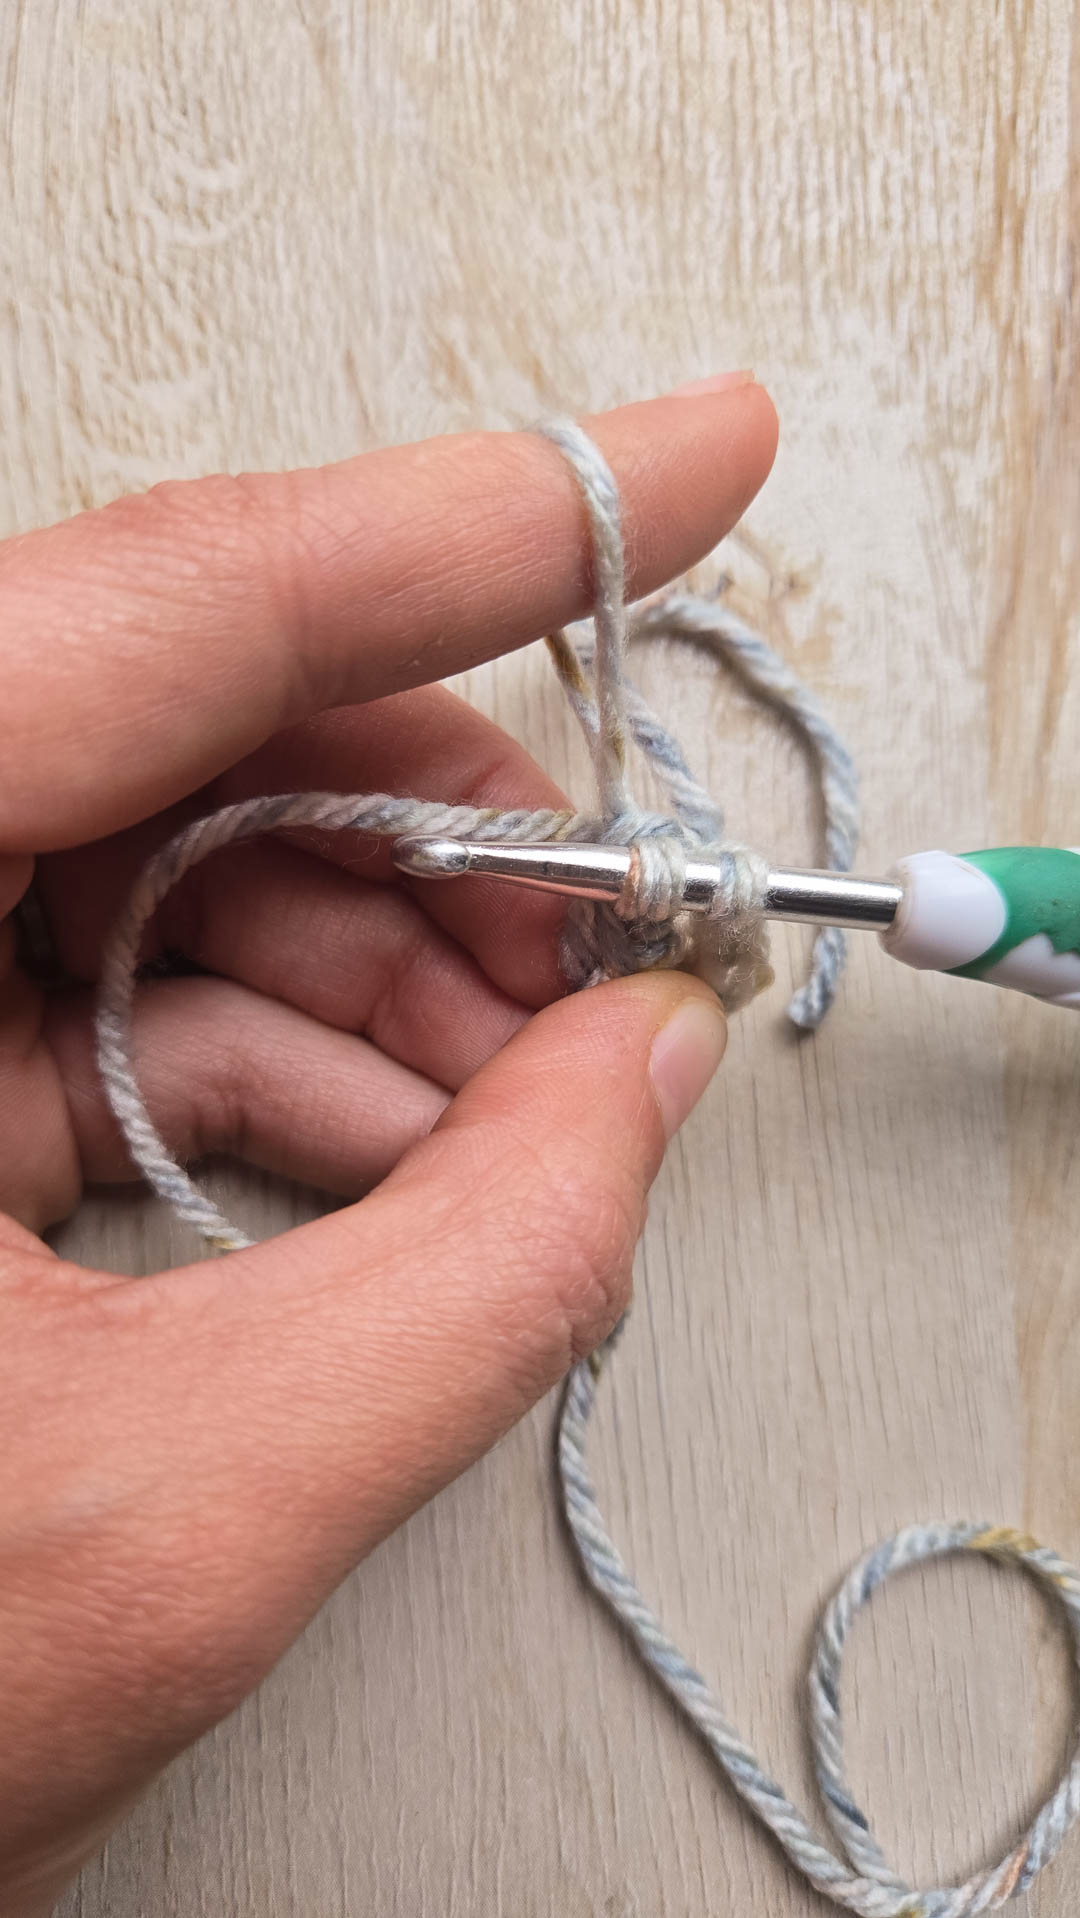
Step 4
Carefully remove finger, YO as normal, and draw through the 2 loops on hook (3 loops if you’re counting both sides of the drape). Loop st finished!
The height of this st is the same as a sc; it just has a secure loop out the back end! This method is perfect for replacing single crochet stitches, or if you’re designing your own pattern from scratch. The only thing to note is that with this method, the fur will be on the ‘wrong side’ of the project due to the way loop stitches are made. If you place your loop stitches every st, it won’t be noticeable. Here’s an example of a finished result, with loop stitches made every st in a 12-stitch round.

While you could stop here and call it finished, you could also cut the loops for an even furrier crochet look! Stick your scissors underneath each loop (ideally a bunch of loops at once, if you can manage it) and snip, snip, snip until all the loops are divided.
And if you wanted to go a step further, try brushing the threads out with a fine-toothed brush. Don’t go crazy and brush too hard however, or you’ll potentially unravel your hard work – talking from experience here. If you desire a truly bushy crochet fur look, I recommend trying method 2.


How to Crochet Fur: Method 2
This is definitely my favorite way to crochet fur, because you can add it after the project is done, even to several-year-old creations that need a bit of spiffying up.
First, you’ll need a LOT of short threads, and if you’re covering a larger area (such as my squirrel’s tail), you’ll need LOTS and LOTS and LOTS. Fortunately, I’ve found a really simple way to make them quickly.
First, wrap your chosen crochet fur color around the fingers of your non-dominant hand a bunch of times until your hand basically resembles a spool of thread. You can wrap it around as many fingers as you desire; more fingers mean longer threads, and longer threads mean longer fur. For my squirrel tail in the example images, I wrapped my yarn around 3 of my fingers.
How many times should you wrap the yarn around your fingers? It depends on how many threads you want, but I would definitely err on the side of less. You can always make more, but if you have too much, you’ll probably have random scraps of yarn lying around for a long time to come. I find I can only wrap the yarn around roughly 50 times before it gets rather tricky to cut.
For my squirrel tail, I needed to wrap the yarn around my fingers approximately 325 times (just a rough estimate), and since I was making bundles of 50, that meant I repeated this procedure around 7 times and had a bit extra.
Next, maneuver the scissors under the wrappings (don’t cut your fingers!) and cut the whole spool in one go. You’ll end up with a pile of short threads, as shown in the following images.
Remember, you can incorporate different colors too!


Now you’re ready to start adding fur!
Start with a finished crochet object.

Step 1
Insert your hook underneath one of the stitches on your project. Any one of the stitches will do.
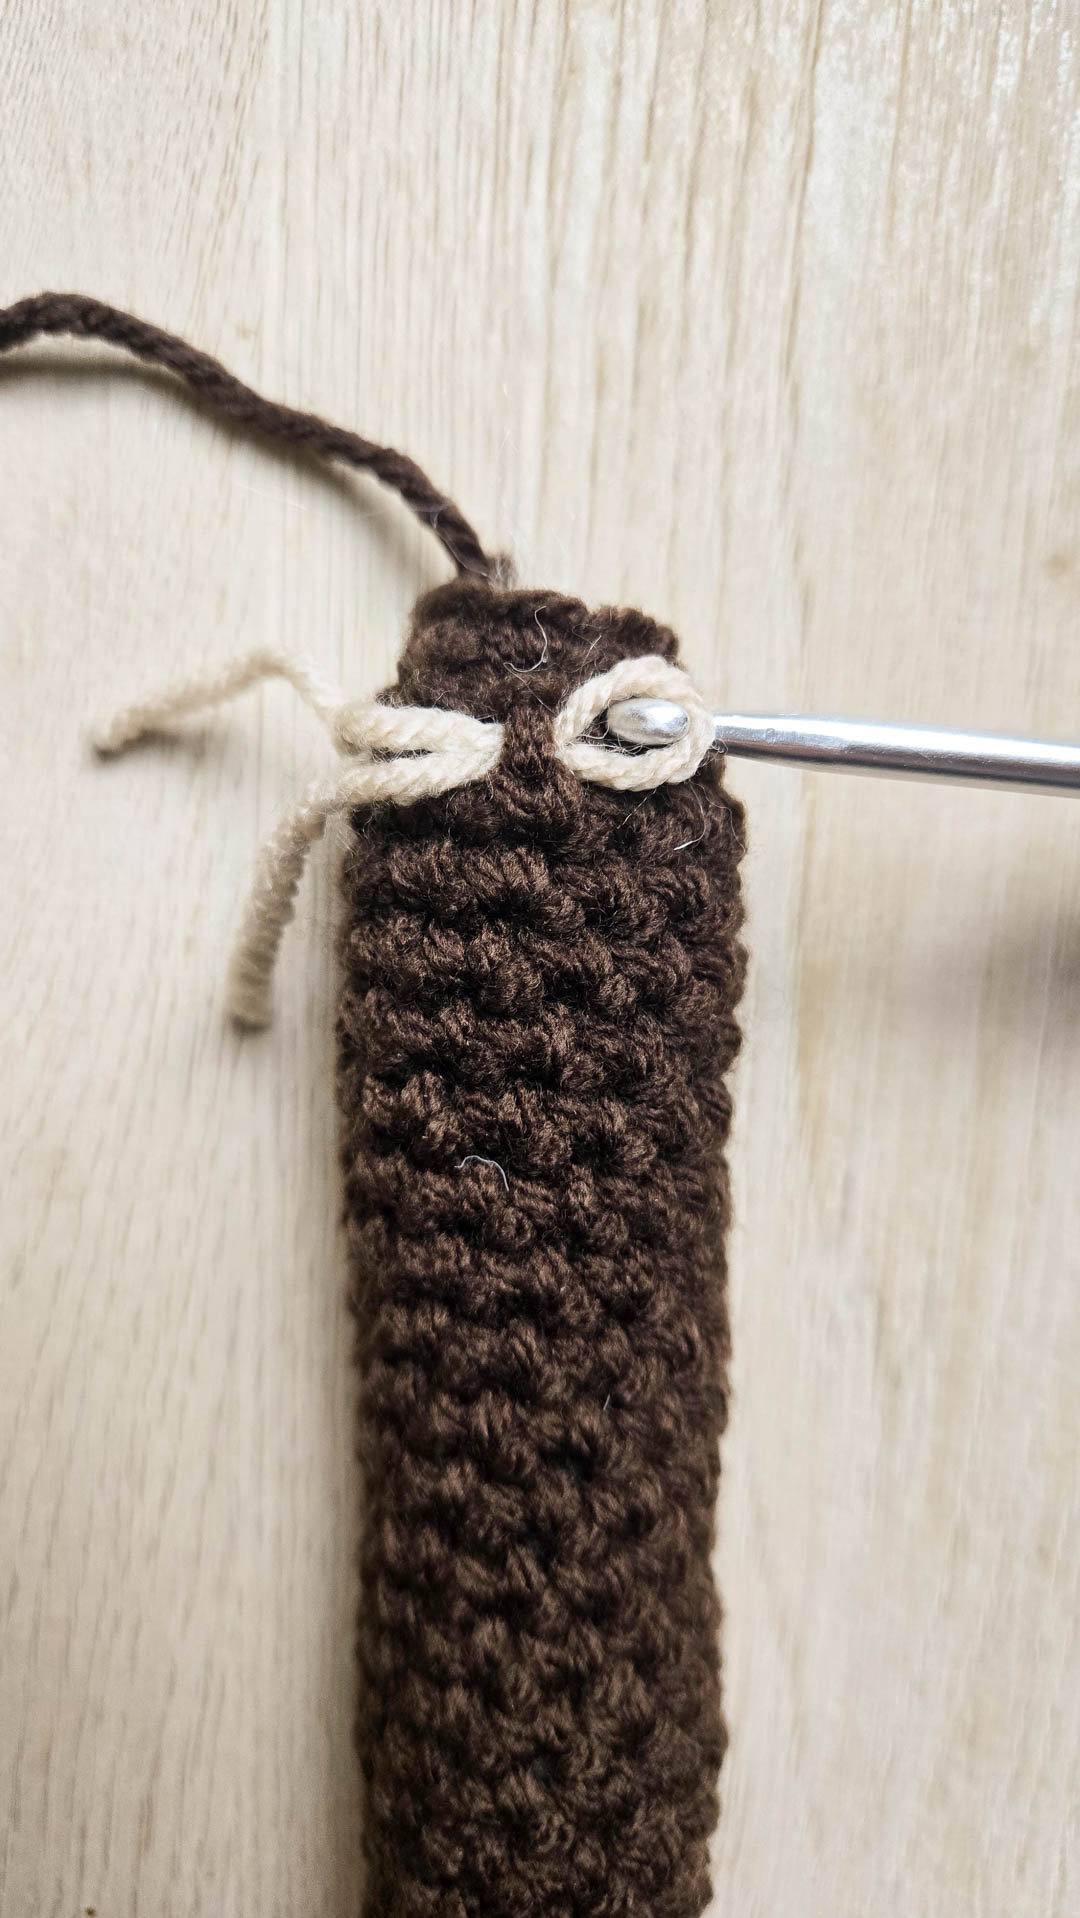
Step 2
Using your hook, grab the middle of one of the threads and pull it half way through the stitch you’re under.
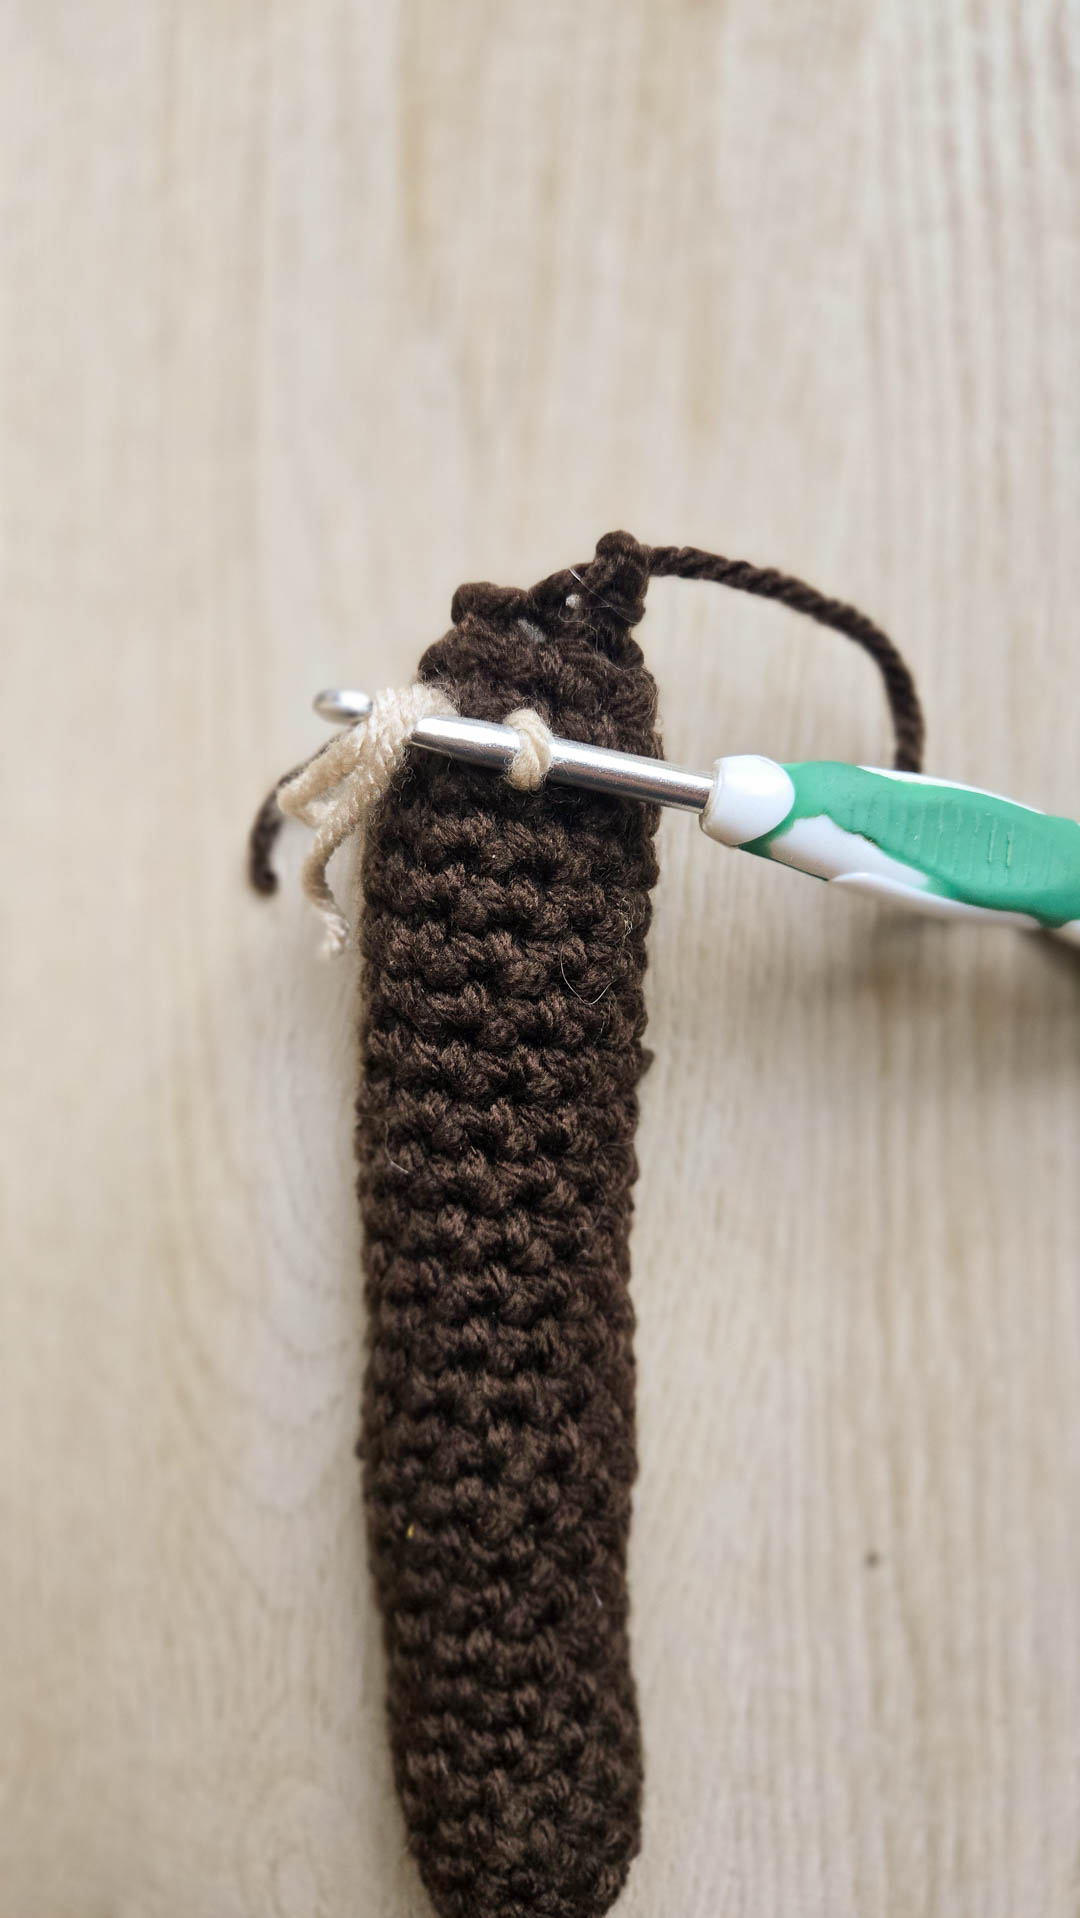
Step 3
With the loop of the thread still on your hook, reach across and grab the thread’s two ends.
Step 4
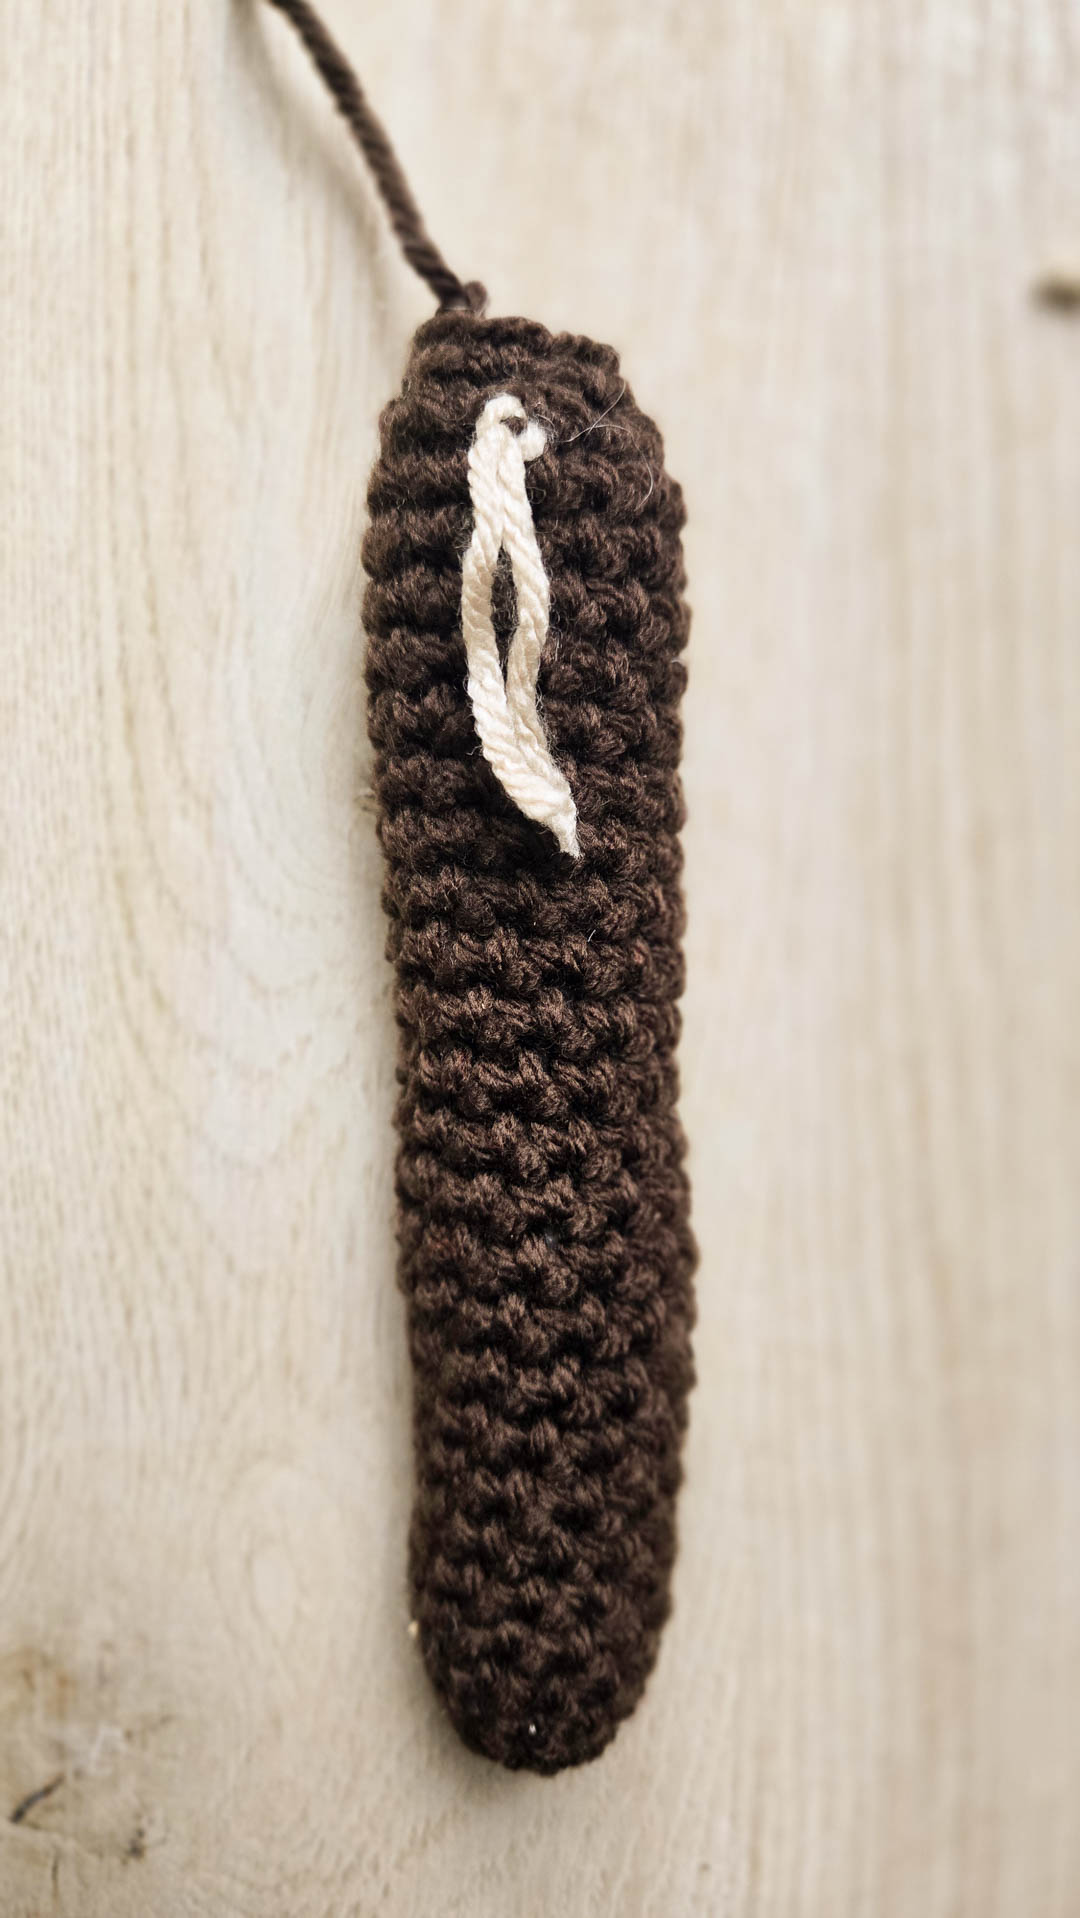
Pull the two yarn ends throught he loop and pull tight. The result will be a knot with your first two tufts of crochet fur.
Repeat in the adjoining st, and in the next one, and in the next one, circling your way up or down or in any direction you please. It’s rather fun when you get the hang of it! Continue adding threads in this fashion, stitch by stitch, until the entire object (or as much as you desire) is bushy. You could stop now, or you could brush the threads out.


How to ‘Fluff’ Crochet Fur
This technique can apply to both methods, but it works much better with method 2. If you brush out the loop stitch method too aggressively, you may end up with an unraveled project.
I do not recommend brushing out anything that will be given to babies who may try to suck/eat the crochet fur, just in case a fluffy tuft comes loose. For children toddler age and up who just want to play with your project, this will be perfect.
Start in one small area. Using a fine-toothed comb or a brush, begin brushing the very tips of the threads apart. Slowly work your way down the threads after your desired ‘fluffiness’ is achieved. It might take a few minutes, but enjoy the process! There’s something very satisfying about seeing simple threads become realistic-looking crochet fur. Once your small area is brushed out to your satisfaction, move onto the next and repeat.
Continue brushing, working in small sections in order to prevent knots.
By and by you’ll have ultra fluffy, realistic crochet fur!


Keep an eye out on my Etsy shop for my crochet squirrel coming soon! I post pretty regularly on my Instagram and Facebook stories, so be sure to take a peek if you’re curious about upcoming patterns and my day-to-day life! For more crochet patterns, be sure to check out my crochet pattern portfolio, and keep an eye on the blog for more crochet techniques in the near future!
Pin This Post for Later with the Image Below!
